Search

Steve's Stuff

Random postings of tech and other life things…

Category

Uncategorized

Trouble upgrading Synology DSM

I use my Synology for so many things for my home network. 

  • Synology Photos with mobile backup
  • Plex Home Media Server
  • Homebridge
  • Synology Drive
  • Node on my Tailscale account
  • Target for backups via Time Machine (Mac) or Windows Backup

I’ll be working on separate posts on each of these to share more info on each, but with this being such a critical piece of my home network, keeping it updated is essential. I often check in on each application and apply any new update that has been released as well as the DSM software that runs on the Synology.

I recently ran into an issue where I need to install the new Node.JS v20 to support the newest update to Homebridge. Unfortunately I was not able to locate the v20 package for Node.JS, only the v28 one. I wondered if I needed to update the Synology DSM version. I went in and checked and it was running 7.1.1-42962 and checking for new updates in the web interface returned that I was at the latest. So I started getting confused and began to do some research. It turns out that there was a newer version of the DSM available but I needed to manually update by downloading the correct versions and applying a manual update to bring me current. So, if you are in the same situation here’s the steps to follow to bring everything current:

Steps to upgrade

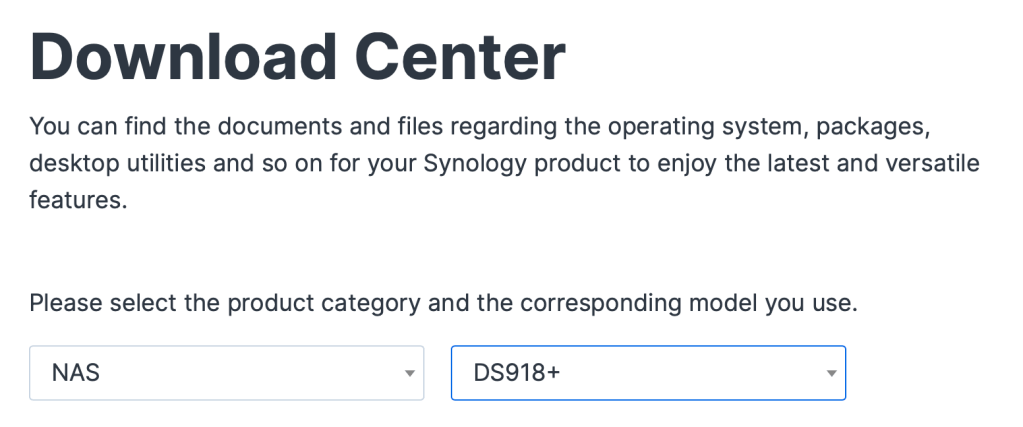
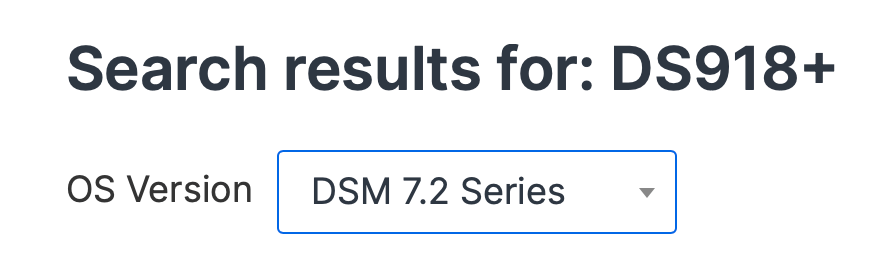
First, go to this link and choose the model you have and the version of DSM that you’re currently using:
https://www.synology.com/en-us/support/download
For me this was

Next, I chose the OS version of DSM that I wanted to go to

Finally I choose the DSM version I’m running and which DSM version I’d like to upgrade to. This will give you a list of the patches to apply and in which order to bring you to the version you want. In this case I chose the latest version which was 7.2.1-69057

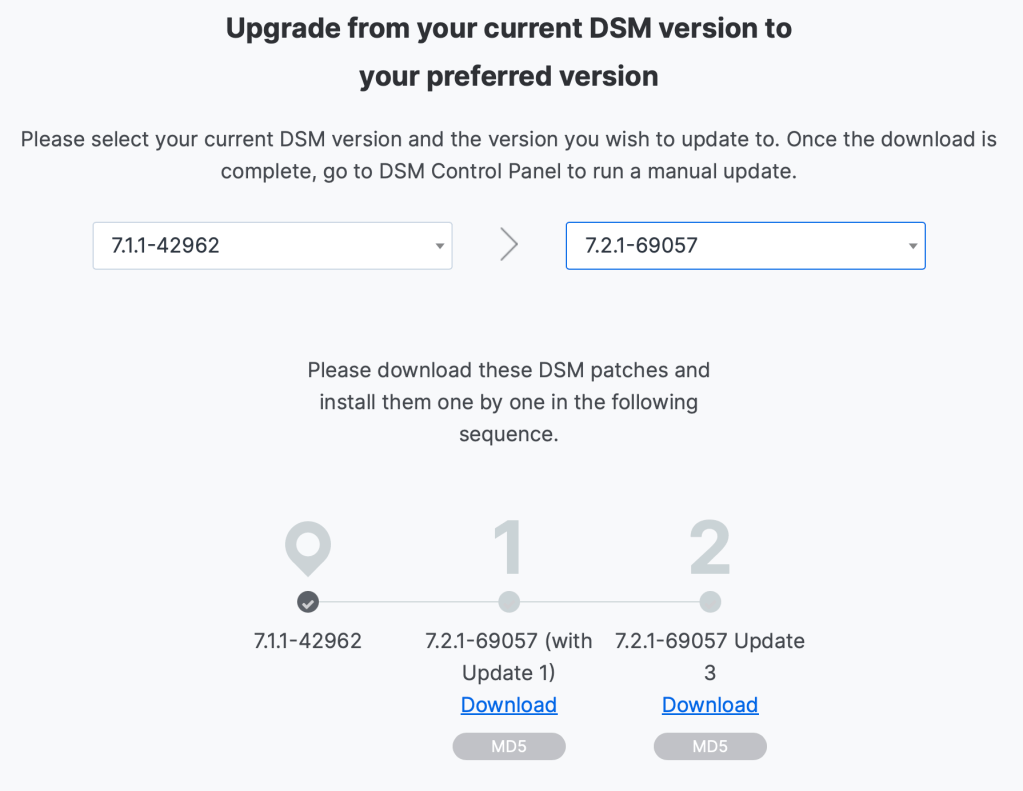
I downloaded all the files making a note of which one to apply first, and then second. Next, I logged into my Synology and opened up Control Panels and clicked on Update & Restore.

I then clicked on the Manual DSM Update button and browsed to the location where I saved the 7.2.1-69057 (with Update 1) and applied the update. It took about 10 minutes for the update to apply and the Synology rebooted. I repeated the same process again for 7.2.1-69057 (with Update 3). After that finished I am now at the most current version.

After this was completed, I was then able to see the Node.JS v20 package and install that and the Homebridge package update that started this whole process.

I hope this may help others that are struggling like I was initially on why my DSM wasn’t updating and how to get it current again.

Setting up a home lab (Planning stages)

While most things these days are living in the cloud and cloud adoption is at an all time high, we still currently have most things living in our own datacenter running on VMware. So there is still a case to be made that home labs still have a place and a purpose when trying to test out new things in that space. With that being said, my current lab equipment has a few years on it, so while I’ve read posts online that say this does work, how well and effective it works remains to be seen.

“Do or do not. There is no try” -Yoda

While I try to follow Yoda’s teachings as much as possible, I am going to attempt to reuse some equipment that has been around a few years and see how far I can get with it. The hardware are three Intel NUC 8th generation machines with 32GB of RAM each. They are all using a USB attached drive to boot from since ESXi still can’t see the MicroSD card slot present on the machine.

The plan is to install the latest version of ESXi 8 along with a Vcenter server of the same version. I have a MacBook Pro as well as a Windows 11 home desktop that can be used to do the deployment of the Vcenter server. I’ll update future blog posts of my progress and experience but will be pulling helpful info from others out there from their previous experiences. More to come so stay tuned.

Running Windows 11 in VMware Fusion

I’ve been seeing lots of people trying to run Windows 11 in the virtual space. I wanted to do the same thing to test out the new OS so wanted to document the steps for anyone else wanting to do the same.  Note, Windows 11 have unique requirements than previous versions of Windows, so there’s a few steps you will need to manually do to prep the Fusion VM to run it.  System Requirements

First, create a new virtual machine in Fusion. When it asks for the ISO file provide the Windows 11 ISO.

Next, choose Microsoft Windows, and the Windows 10 x64

Leave the default set to UEFI, and choose Continue

On the last screen, choose Customize Settings

Now pick a location to save the VM

When you get to the settings screen, we’ll need to make 3 changes

1. Enable Encryption 

You’ll be asked to set an encryption password. Please store this somewhere safe. You can also check the Remember Password to store this password in your Keychain Access as well. If you don’t remember it, you’ll have to enter this password every time you use the VM.

2. Install a TPM Module

(Windows 11 requires that computers have a TPM module to run. More on that can be found here link.)

First you need to click on Add Device in the top right of the Settings window

Next, click on Trusted Platform Module and choose Add

3. The last step is required because by default VMware Fusion sets any Windows 10 VMs to 2GB of RAM. Windows 11 requires at least 4GB of RAM for it to install. It needs to be a minimum of 4GB.

That’s it. Save the settings and boot the VM and you will be off and running doing the install. Thanks for reading and happy virtualizing!

Adding disk cleanup to Server 2008 machines

Have you ever wanted to run disk cleanup on a server but found out it’s not installed?  One way to get it installed is to install the Desktop Experience feature via Server Manager.  While this will install disk cleanup, it also installs other things you don’t necessarily need.  There is a faster way to manually install it if that’s all you’re looking for. Basically, you manually copy 2 files for it from the winsxs folder into the current system folders. Run these commands from an elevated command prompt.

copy C:\Windows\winsxs\amd64_microsoft-windows-cleanmgr_31bf3856ad364e35_6.1.7600.16385_none_c9392808773cd7da\cleanmgr.exe %systemroot%\System32
copy C:\Windows\winsxs\amd64_microsoft-windows-cleanmgr.resources_31bf3856ad364e35_6.1.7600.16385_en-us_b9cb6194b257cc63\cleanmgr.exe.mui %systemroot%\System32\en-US

Once that’s done, you can run disk cleanup by typing cleanmgr.exe from a command prompt.  It’s that easy.

Nintendo Power’s final issue, does that mean anything to the Wii U

This month is the last month that print gaming magazine Nintendo power will put out an issue. Ars Technica has a great article written up on it here http://arstechnica.com/gaming/2012/11/final-nintendo-power-cover-brings-the-magazine-full-circle/

It’s sorta sad to see something that I grew up with ending after so many years of production.  But with the invent of the internet and the ability to put info out same day without having to wait for a publish date, it makes sense that print can’t compete or keep up with that.  

I especially like the cover almost matching the cover from issue 1 all the way back to 1988.  It’s ironic that it hits around the same time that Nintendo is launching their latest console, the Wii U.  I don’t think many were still reading hte print magazine so probably won’t have much affect on the bottom line as a whole.  But I just imagine a kid sitting in the back seat flipping thru the magazine telling their mom and dad all the games they need to buy them.  But maybe I’m just dreaming of the past… and not the future.

New iMac on the way

So I finally did it the other day. I decided to take the plunge and buy me an iMac. I played around with a lot of configs before deciding on the one I bought. So what I got was:

17″ iMac Core 2 Duo
2.0 GHz processor
2 GB RAM
250 GB Hard Drive
Bluetooth wireless keyboard and mighty mouse

All in all, it sounds like a great machine that should be very fast. I’m used to using a 450 MHz Mac before this, so it’ll be quite a step up on the Mac side. I’m also hoping that I will be able to decomission my other Dell PC in place of this iMac. My two thoughts on that are one, some of the stuff I did on my Dell was because my Mac was so slow and not able to do what I wanted it to do. The second is that since it’s an Intel Mac, I’ll have a whole lot more options in getting the windows things I need on the Mac. For one, there’s Parallels for virtualization, and then there’s Boot Camp for that have to have PC games that the developers won’t make for the Mac. All in all, it should clean up the 1000+ cables I have floating around my desk area and make it look much better than it does now. I’ll keep you posted on when it arrives, which should be by Monday.

Blog at WordPress.com.

Up ↑